Play an audio file with XAudio2
Alright, I hope that with this you can get an idea on how to play an audio file using XAudio2, which is a low level audio API used for games in Windows. You can find more tutorials in the documentation if you want to know more. There’s even a whole tutorial on how to do this but in a very Windows way, which I didn’t like that much, so I made some changes to that code. This implementation is mostly done with C++ code and some elements of OOP. There are many ways to do this, but this is what I did.
Understand COM
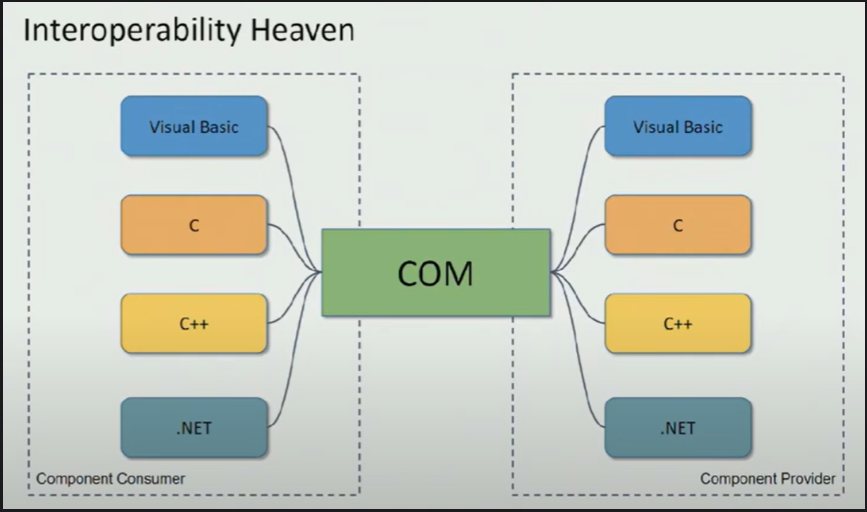
Before we get started let’s just take a moment to understand the Component Object Model(COM). The way libraries like DirectX11 and XAudio2 handle memory is with this model. You can get more information online and in the documentation, but what you need to know is that you don’t really create COM objects yourself, the system takes care of that. Actually, the process is done under the hood where a DLL somewhere in your computer handles that memory. In that way we’ll only need to get a reference to interfaces that will be created by COM. We’ll use methods to create and release those objects. Now, let’s start coding.
#Starting the engine
First we’ll include a header from the XAudio2 library. You can either place it in your App.cpp, Game.cpp, main.cpp, doesn’t matter. Also add the stdio just for displaying errors.
#include <xaudio2.h>
#include <stdio.h>
We need to initialize the COM Objects, we do that by using this function and checking the return value which is given by an HRESULT. This value type represents success codes that show if a COM function worked, or didn’t work.
HRESULT result = CoInitializeEx(nullptr, COINIT_MULTITHREADED)
if (FAILED(result))
{
	printf("Error initializing COM\\n");
	return -1;
}
Then create a pointer to a IXAudio2 .
IXAudio2* m_pXAudio2 = nullptr;
This interface is part of the COM system, therefore we need to create it using the result variable.
result = XAudio2Create(&m_pXAudio2, 0, XAUDIO2_DEFAULT_PROCESSOR);
if (FAILED(result))
{
	MessageBox(hwnd, L"Failed to initialize XAudio2!", L"Error", MB_OK);
		return -1;
}
Next thing we’ll do is create a Mastering Voice, which can be understood as a voice of the audio engine.
IXAudio2MasteringVoice* m_pXAudio2MasteringVoice = nullptr;
result = m_pXAudio2->CreateMasteringVoice(&m_pXAudio2MasteringVoice);
if (FAILED(result))
{
		printf("Error creating mastering voice\\n");
		return -1;
}
Then, let’s take advantage of the whole Object Oriented Paradigm and let’s create a class called Audio with a method to load audio files. Because this is Windows we’ll use some native structs defined specifically for audio, like WAVEFORMATEXTENSIBLE and WAVEFORMATEX . We’ll also need an XAUDIO2_BUFFER and a pointer to an array of bytes. The first will store a pointer to a buffer and the array will store the buffer of audio samples.
class Audio
{
public:
 Audio() = default;
 ~Audio() = default;

 //Load a wave file to a XAUDIO2BUFFER struct
 void load(const char* filename);

 WAVEFORMATEXTENSIBLE m_waveFile{ 0 };
 XAUDIO2_BUFFER m_buffer{ 0 };

private:

 unsigned char* m_pDataBuffer = nullptr;
};
Let’s include the fstream header so that we can read the audio file
#include <fstream>
using std::fstream;
Create a handle to the file to read it in binary mode. If it couldn’t be opened, return the function, if not continue and close the file.
void Audio::load(const char* filename){

 fstream file(filename, std::ios::in | std::ios::beg | std::ios::binary);
 if (!file.is_open())
  return;

 file.close();
}
Wave File Format
Until now everything’s cool but let’s learn about the wave file format. It’s basically a container of bytes that is interpreted as audio by the computer. Now, this is like a subformat, the real format is RIFF which is used for video, audio, images, etc. The most important thing to understand here is that the RIFF format is formed by chunks which carry information that helps the computer understand if the file is a video, audio or an image.

You can see in this image that we have 1 RIFF chunk and 2 subchunks. The first chunk tells us whether the file is a wav file or not. The FMT chunk tells us properties about the audio file, and the data chunk has the plain old data in bytes. This tells us that audio files are just a bunch of byte data structured in chunks.

The RIFF, FMT and DATA chunks are essential for any audio file, but there are more chunks. As you can see in this file, it starts with the RIFF chunk but later it jumps to something called JUNK chunk.

If I keep looking in binary mode I can also find metadata embedded in the file such as the DAW where it was created. But this is no problem as what we mostly care from the subchunks is the Chunk ID and the Chunk Size. We can read the ID and tell the computer if the ID is the format chunk ID do certain things. But, if it’s an unknown ID, do something like skip this part of the binary file. If we look at the WAVEFORMATEXTENSIBLE, the struct defined by Windows, we can find there are more fields.
typedef struct {
    WAVEFORMATEX    Format;
    union {
        WORD wValidBitsPerSample;       /* bits of precision  */
        WORD wSamplesPerBlock;          /* valid if wBitsPerSample==0 */
        WORD wReserved;                 /* If neither applies, set to zero. */
    } Samples;
    DWORD           dwChannelMask;      /* which channels are */
                                        /* present in stream  */
    GUID            SubFormat;
} WAVEFORMATEXTENSIBLE, *PWAVEFORMATEXTENSIBLE;
We won’t need to worry about filling all variables in the struct, we’ll just manipulate bytes instead of filling structures.
Reading the file
So let’s go back to our code. And define a set of values in the preprocessor stage. As you saw in the wave file, there are values in big endian and little endian mode. Now, I won’t get into that as there are many tutorials about this topic. However, just know that endianness is a way to represent the order of bytes in the computer, and that it changes depending on the computer system where a program is executed.
#ifdef _XBOX //Big-Endian
 #define fourccRIFF 'RIFF'
 #define fourccDATA 'data'
 #define fourccFMT 'fmt '
 #define fourccWAVE 'WAVE'
#endif

#ifndef _XBOX //Little-Endian
 #define fourccRIFF 'FFIR'
 #define fourccDATA 'atad'
 #define fourccFMT ' tmf'
 #define fourccWAVE 'EVAW'
#endif
Now, let’s read the FMT chunk that every wave file has. We’ll read every 4 bytes, and if the first four bytes are the letters RIFF, we’ll continue. Same thing for the WAVE part.
void Audio::load(const char* filename)
{
 fstream file(filename, std::ios::in | std::ios::beg | std::ios::binary);
 if (!file.is_open())
  return;

 unsigned long temp_buffer;

 file.read(reinterpret_cast<char*>(&temp_buffer), sizeof(unsigned long));
 if (temp_buffer != fourccRIFF)
  return;

 file.read(reinterpret_cast<char*>(&temp_buffer), sizeof(unsigned long));

 file.read(reinterpret_cast<char*>(&temp_buffer), sizeof(unsigned long));
 if (temp_buffer != fourccWAVE)
  return;

 file.close();
}
That was easy, now here’s the tricky part, we’ll loop through the whole file looking for 4 bytes that correspond to the chunk IDs we defined as preprocessor variables. If the FMT chunk is found, we’ll read the info and store it in the m_wavefile, which is a member variable of our Audio class. If the DATA chunk is found, we create an unsigned char array in the heap, with the size of the data chunk size. Then we tell the m_buffer to point to the m_pDataBuffer which contains all the audio sample data, and tell it that the size is equal to the data chunk size in the file. Finally, if there were no coincidences, the reading pointer of the file skips all the chunk and the process is repeated. By doing this we skip chunks we don’t need.
while (file.peek() != EOF)
{
 unsigned long chunkID;
 unsigned long chunkSize;

 //Read chunk ID
 file.read(reinterpret_cast<char*>(&chunkID), sizeof(unsigned long));

 file.read(reinterpret_cast<char*>(&chunkSize), sizeof(unsigned long));

 switch (chunkID)
 {
  case fourccFMT:

   file.read(reinterpret_cast<char*>(&m_waveFile), chunkSize);
   break;
  case fourccDATA:
   m_pDataBuffer = new unsigned char[chunkSize];
   file.read(reinterpret_cast<char*>(m_pDataBuffer), chunkSize);
   m_buffer.pAudioData = m_pDataBuffer;
   m_buffer.AudioBytes = chunkSize;
   break;

 default:

  file.seekg(chunkSize, std::ios::cur);
  break;
 }

}
Finally we just add a flag to the m_buffer.
m_buffer.Flags = XAUDIO2_END_OF_STREAM;
The final implementation looks like this
void Audio::load(const char* filename)
{
 fstream file(filename, std::ios::in | std::ios::beg | std::ios::binary);
 if (!file.is_open())
  return;

 unsigned long temp_buffer;

 file.read(reinterpret_cast<char*>(&temp_buffer), sizeof(unsigned long));
 if (temp_buffer != fourccRIFF)
  return;

 file.read(reinterpret_cast<char*>(&temp_buffer), sizeof(unsigned long));

 file.read(reinterpret_cast<char*>(&temp_buffer), sizeof(unsigned long));
 if (temp_buffer != fourccWAVE)
  return;

 while (file.peek() != EOF)
 {
  unsigned long chunkID;
  unsigned long chunkSize;

  file.read(reinterpret_cast<char*>(&chunkID), sizeof(unsigned long));

  file.read(reinterpret_cast<char*>(&chunkSize), sizeof(unsigned long));

  switch (chunkID)
  {
   case fourccFMT:

    file.read(reinterpret_cast<char*>(&m_waveFile), chunkSize);
    break;
   case fourccDATA:
    m_pDataBuffer = new unsigned char[chunkSize];
    file.read(reinterpret_cast<char*>(m_pDataBuffer), chunkSize);
    m_buffer.pAudioData = m_pDataBuffer;
    m_buffer.AudioBytes = chunkSize;
    break;

  default:

   file.seekg(chunkSize, std::ios::cur);
   break;
  }

 }

 m_buffer.Flags = XAUDIO2_END_OF_STREAM;

 file.close();
}
Don’t forget that we allocated memory for the m_pDataBuffer, so we need to free it in the destructor.
~Audio() {
   if (m_pDataBuffer)
   {
      delete[] m_pDataBuffer;
      m_pDataBuffer = nullptr;
   }

}
Now, let’s go back to our main and do these few steps. Create an audio object, along with one more interface called IXAudio2SourceVoice .
Audio m_audioFile;
IXAudio2SourceVoice* m_pXAudio2SourceVoice = nullptr;
Then, you will need to create a Source Voice, submit the source buffer and use the start method to play the audio buffer. We’ll also need to do a reinterpret cast in the CreateSourceVoice method because it needs a WAVEFORMATEX. This is easy because the WAVEFORMATEXTENSIBLE struct can be easily interpreted by Windows as a WAVEFORMATEX.
const char* path = "D:/Coding/C++/Direct3DPractice/AudioPrueba.wav";
m_audioFile.load(path);

result = m_pXAudio2->CreateSourceVoice(&m_pXAudio2SourceVoice, reinterpret_cast<WAVEFORMATEX*>(& m_audioFile.m_waveFile));

if (FAILED(result))
{
 printf("Error creating source voice\n");
 return -1;
}

result = m_pXAudio2SourceVoice->SubmitSourceBuffer(&m_audioFile.m_buffer);
if (FAILED(result))
{
 printf("Error submitting source buffer\n");
 return -1;
}
result = m_pXAudio2SourceVoice->Start(0);
if (FAILED(result))
{
 printf("Error starting source voice\n");
 return -1;
}
Sleep and destroy everything
All that’s left to do is set a sleep timer to let the audio play and destroy the voice and the XAudio2 interface when closing the app.
Sleep(3000);

m_pXAudio2SourceVoice->DestroyVoice();

if (m_pXAudio2)
{
 m_pXAudio2->Release();
 m_pXAudio2 = nullptr;
}
Hope you enjoy this short tutorial, and if you have any suggestions let me know in the comments please. Also, tell me if it worked for you or for what project would you like to implement something like this.
Resources
Enjoy Reading This Article?
Here are some more articles you might like to read next: